Create a Multisig wallet on Ethereum with SAFE
AirGap users can create multisig wallets through third-party providers. Currently, AirGap supports multisig creation on Tezos and Ethereum blockchain only. However, AirGap is open to change. We are happy to work with developers together to make Multisig possible on other chains as well. In this blog, we will focus on Multisig on Ethereum via Safe Wallet.
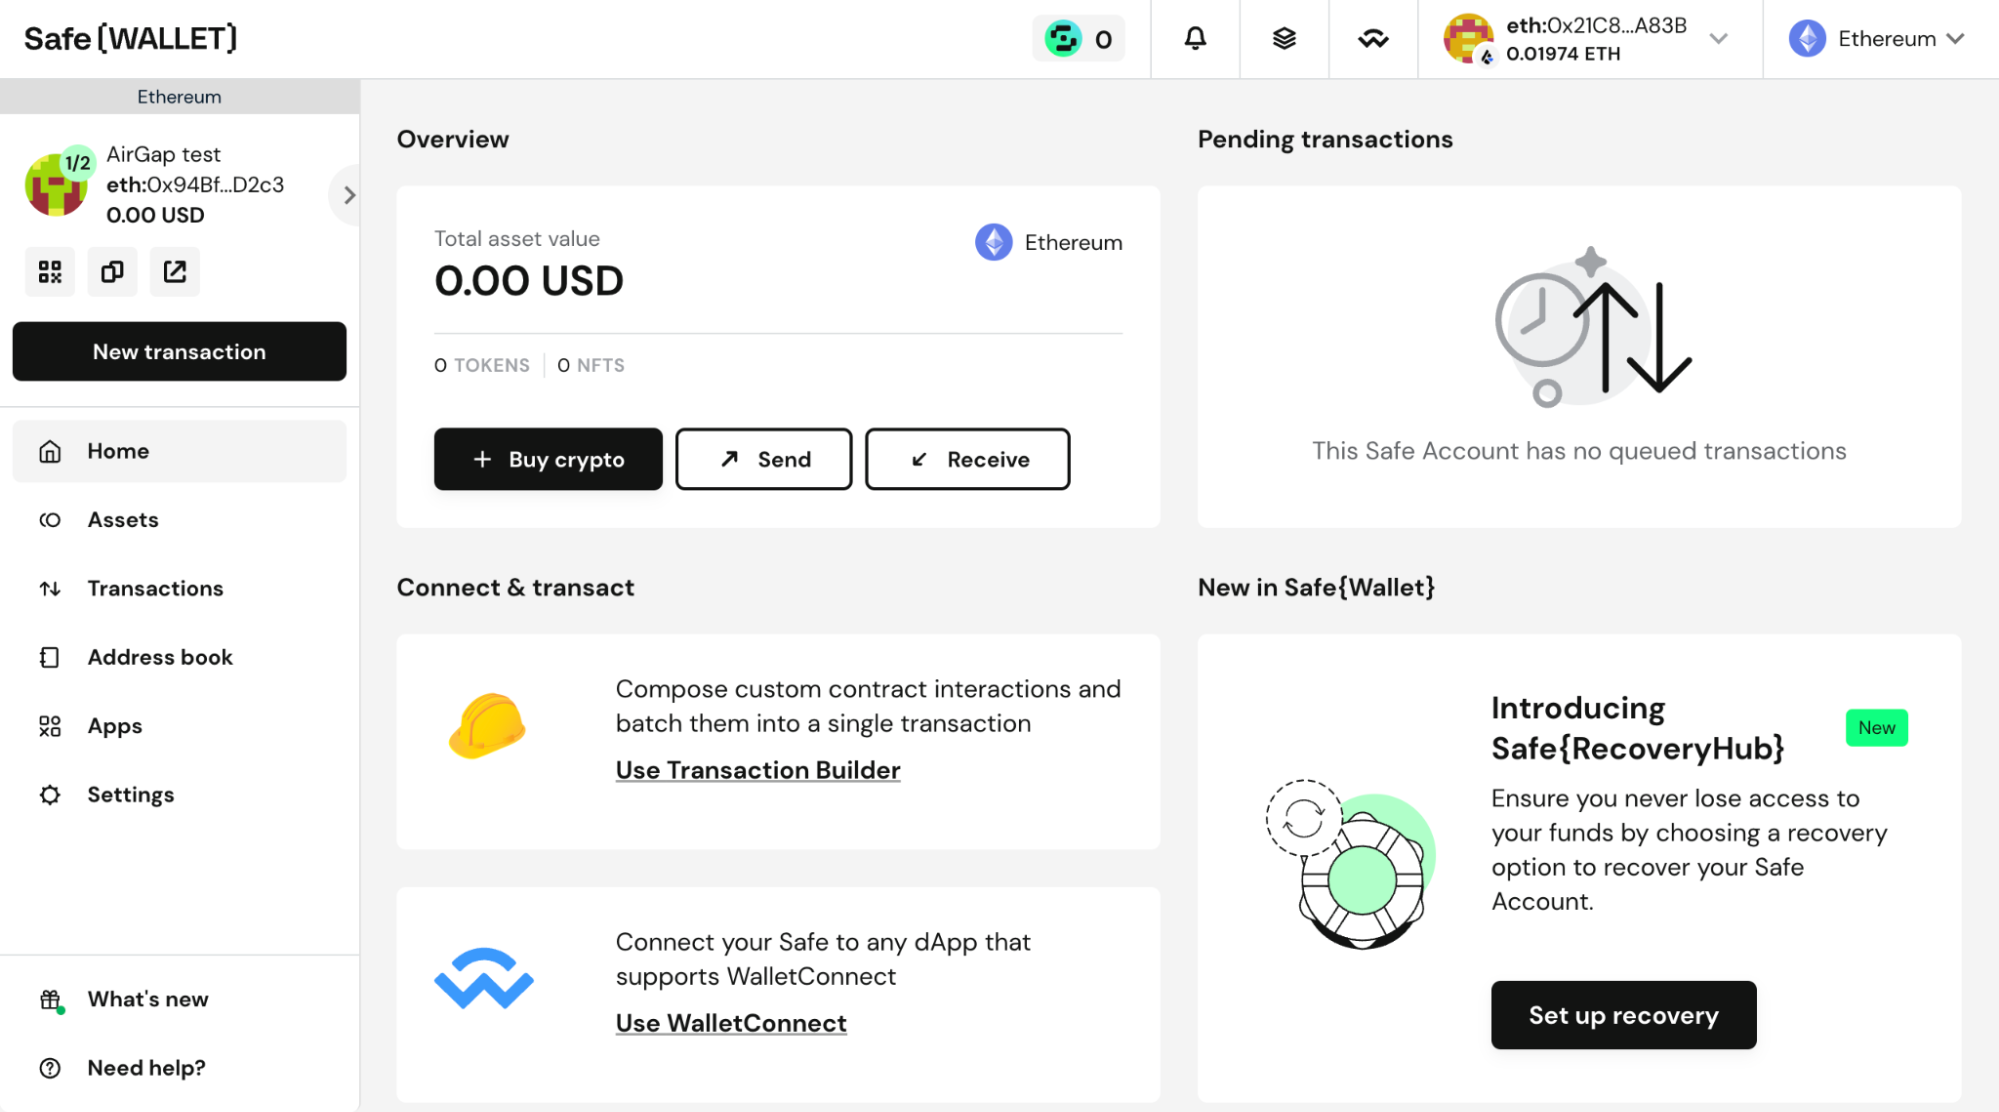
Note that you can create a multi-sig with AirGap, only on the web version of the wallet.
The below-mentioned guides are for those who already have AirGap fully set up. If you are a first-time user, you can check out the setup guide here.
Create a Multisig wallet with AirGap on Ethereum
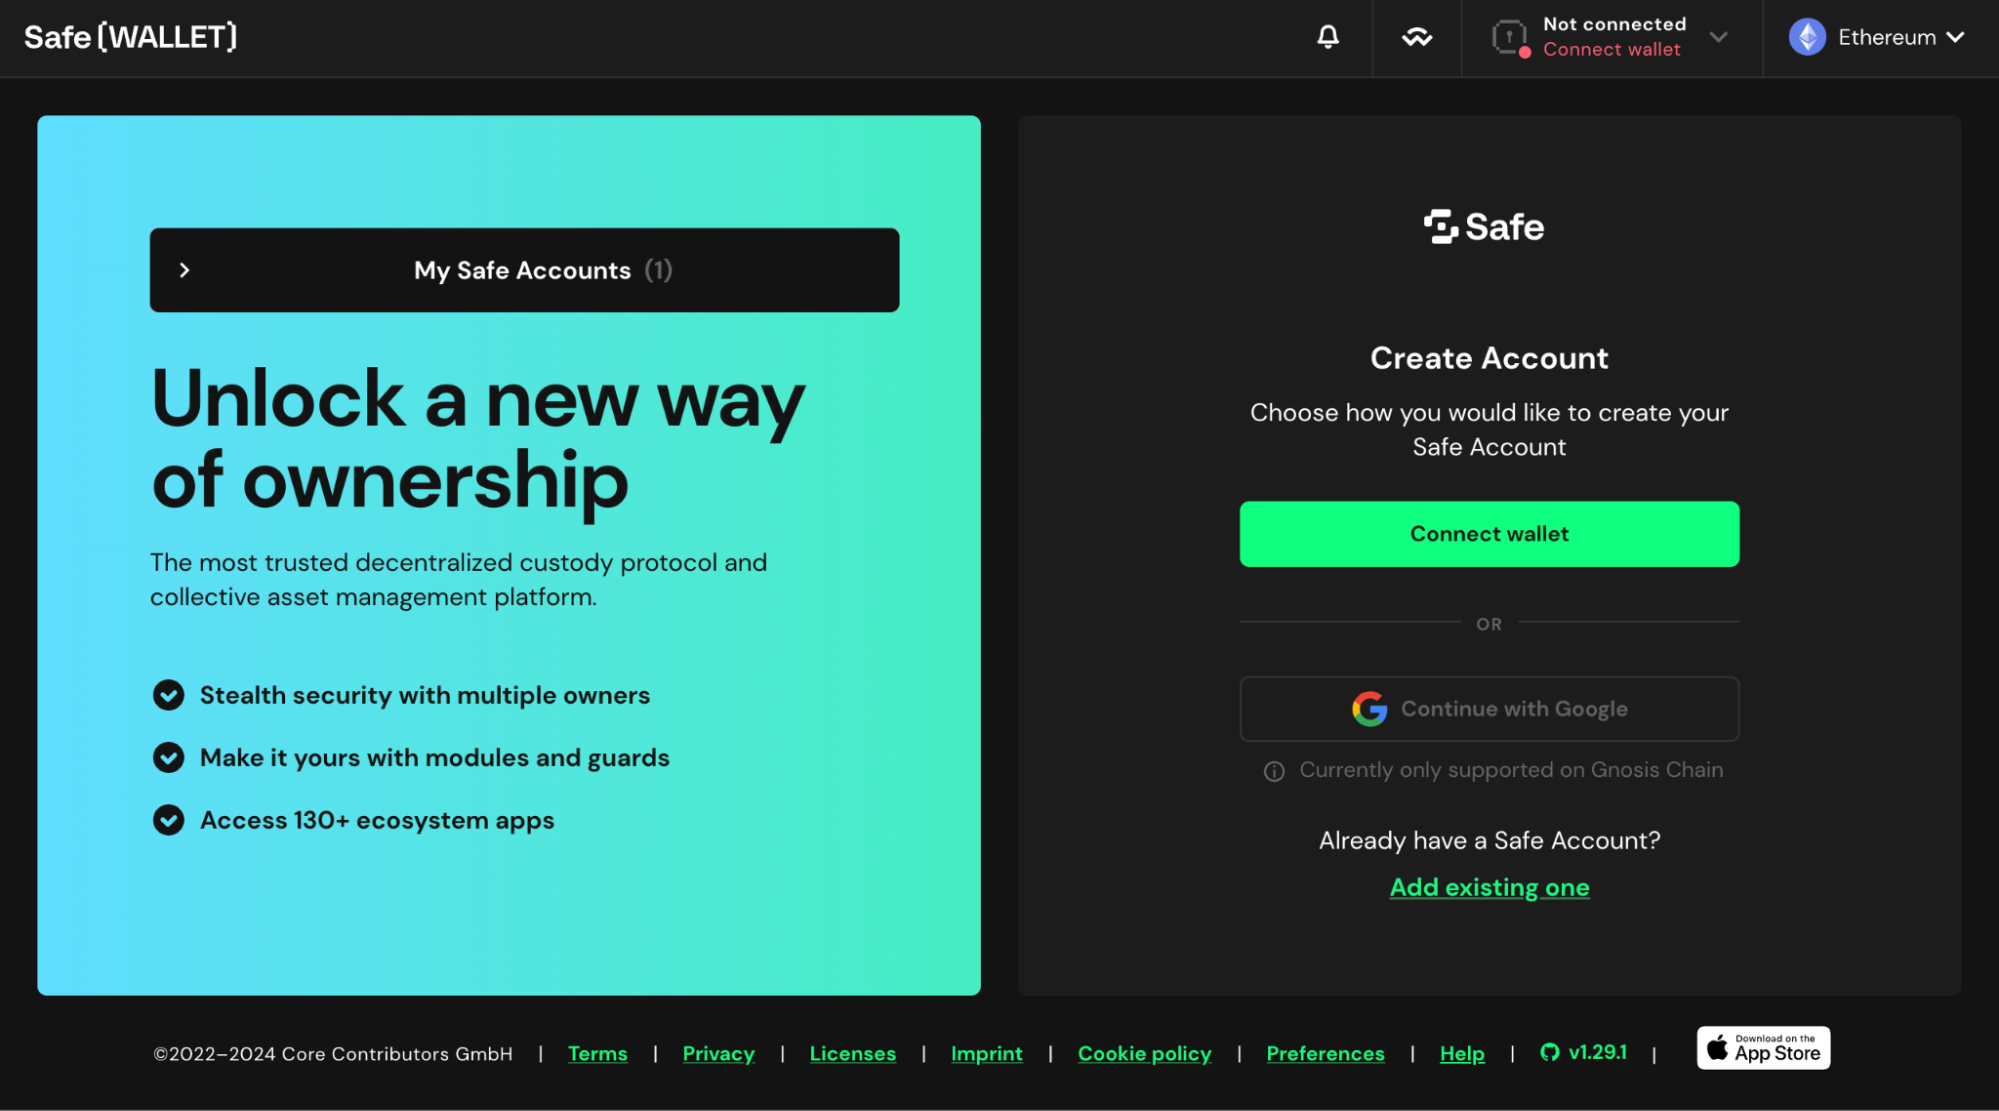
Go to the Safe Wallet website on your browser.
From the home screen, click on the connect wallet button.
- From the list of wallets, select “Keystone”. This is because Keystone and AirGap use the same QR-Code technology for signing transactions. We are working on getting added to the list to improve the user experience.
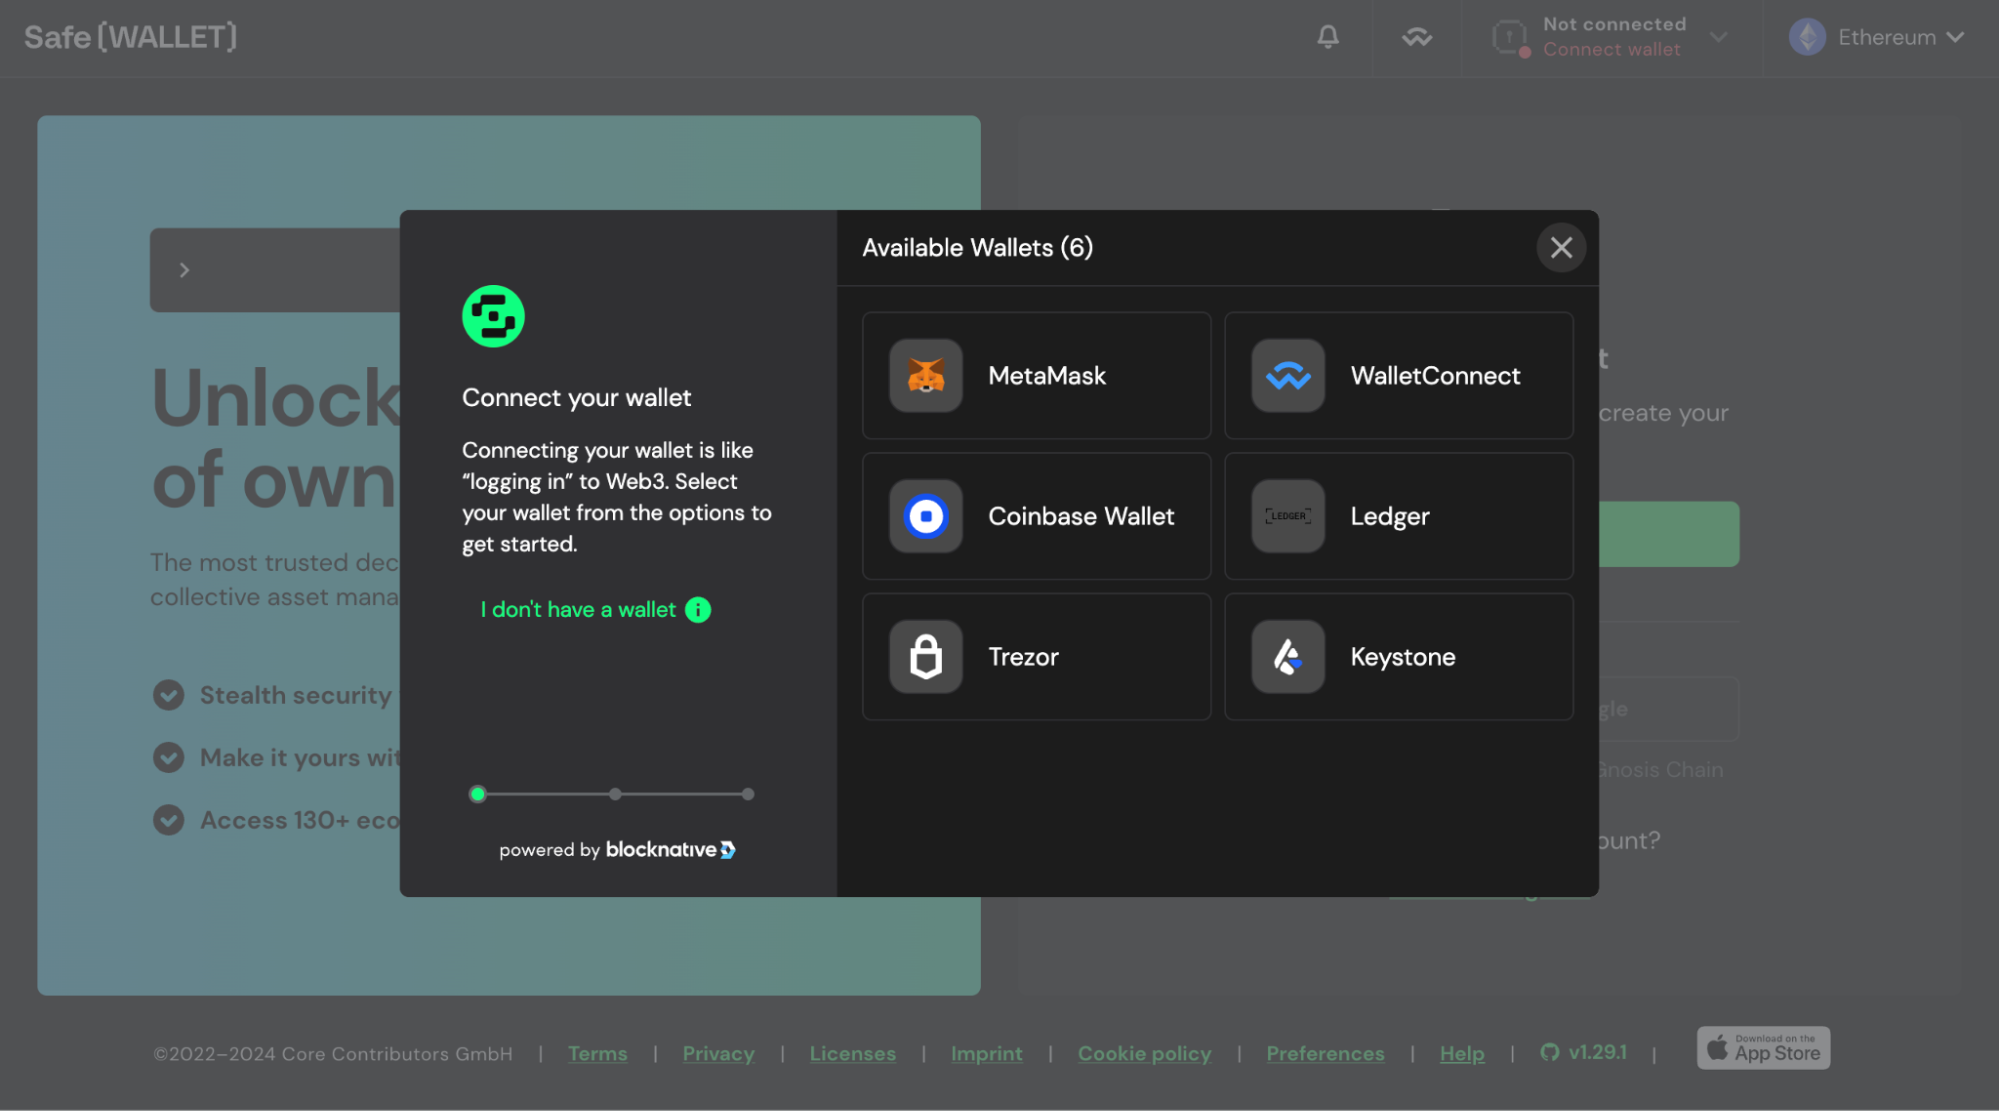
- Simply Click “Sync Keystone”. The steps shown in the popup are specific for Keystone users and can be ignored. Your Camera will now be turned on to scan your AirGap Vault Sync QR-Code. If the camera does not turn on, make sure to allow it in the browser settings.

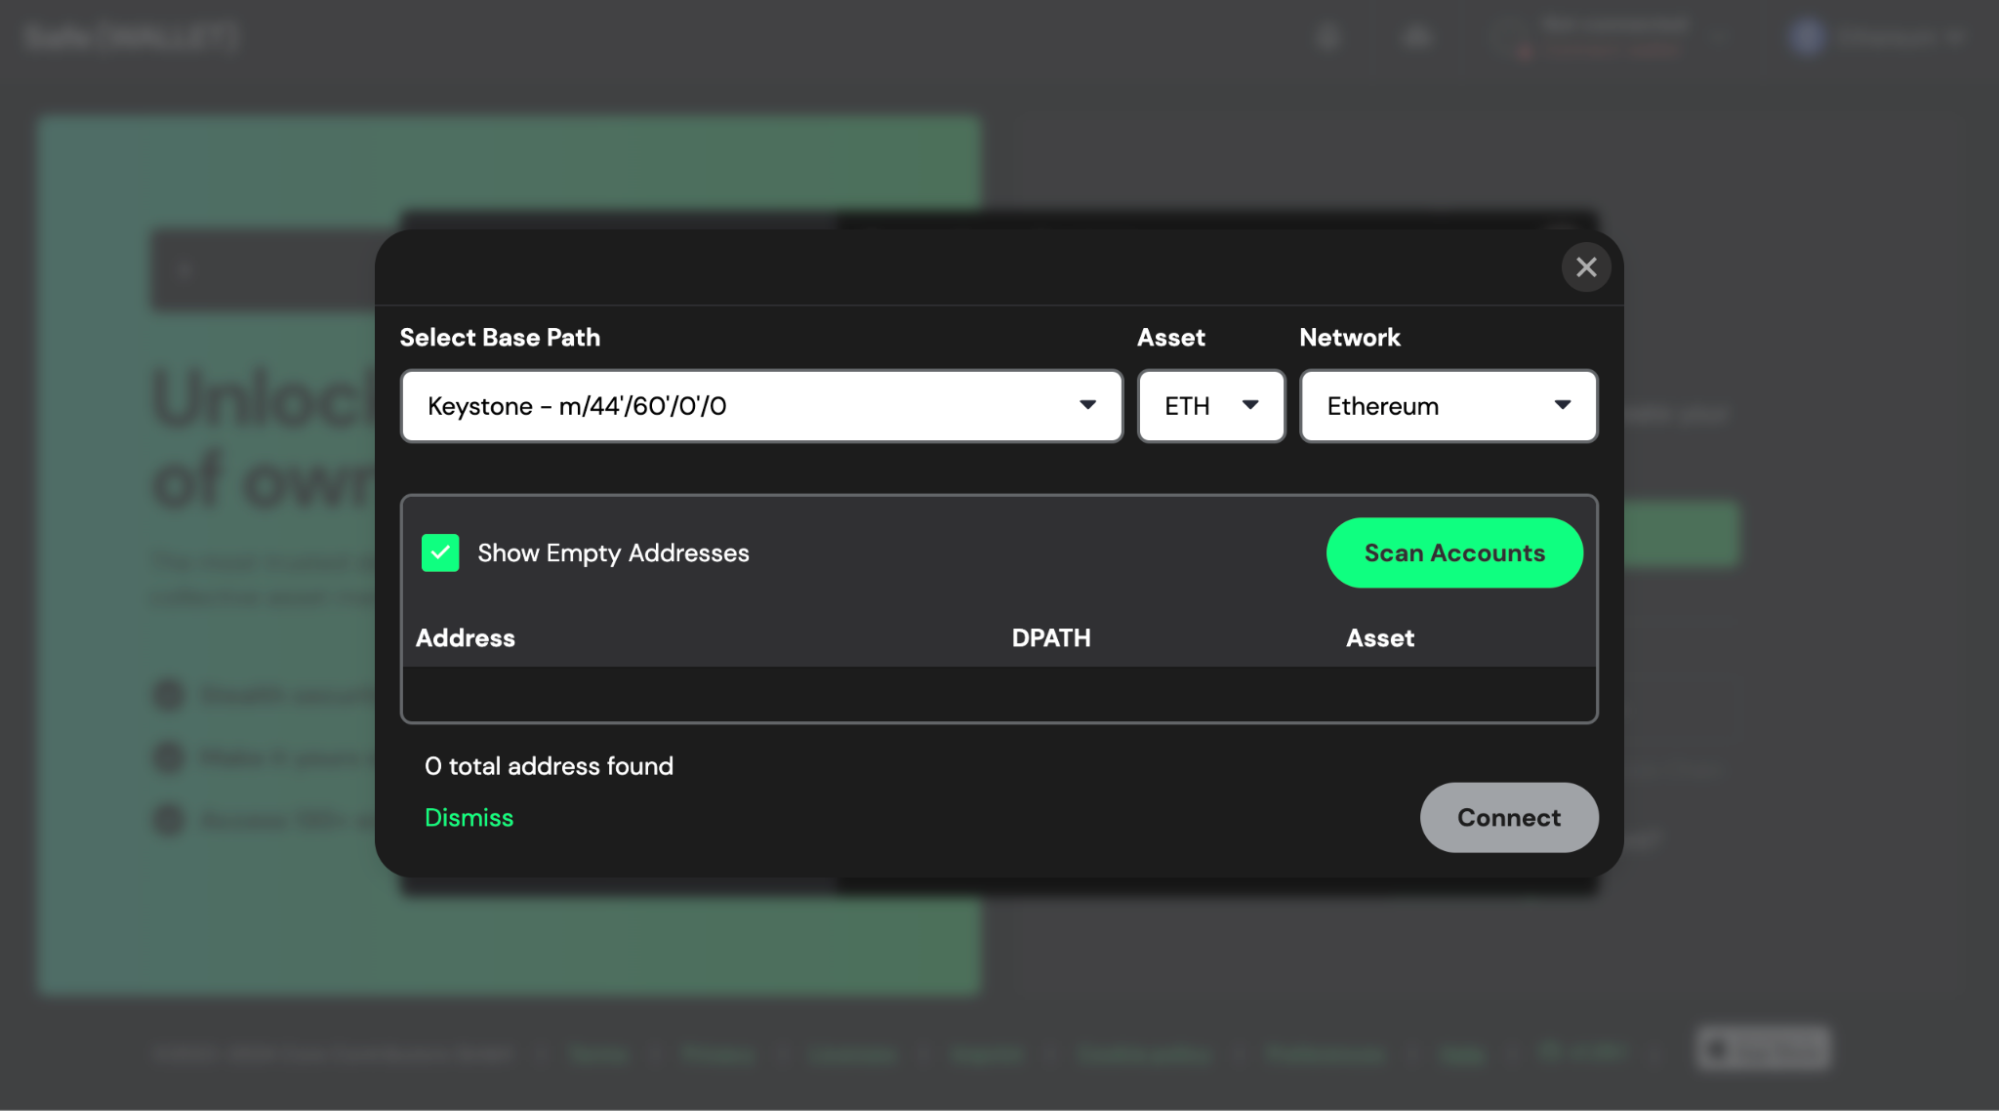
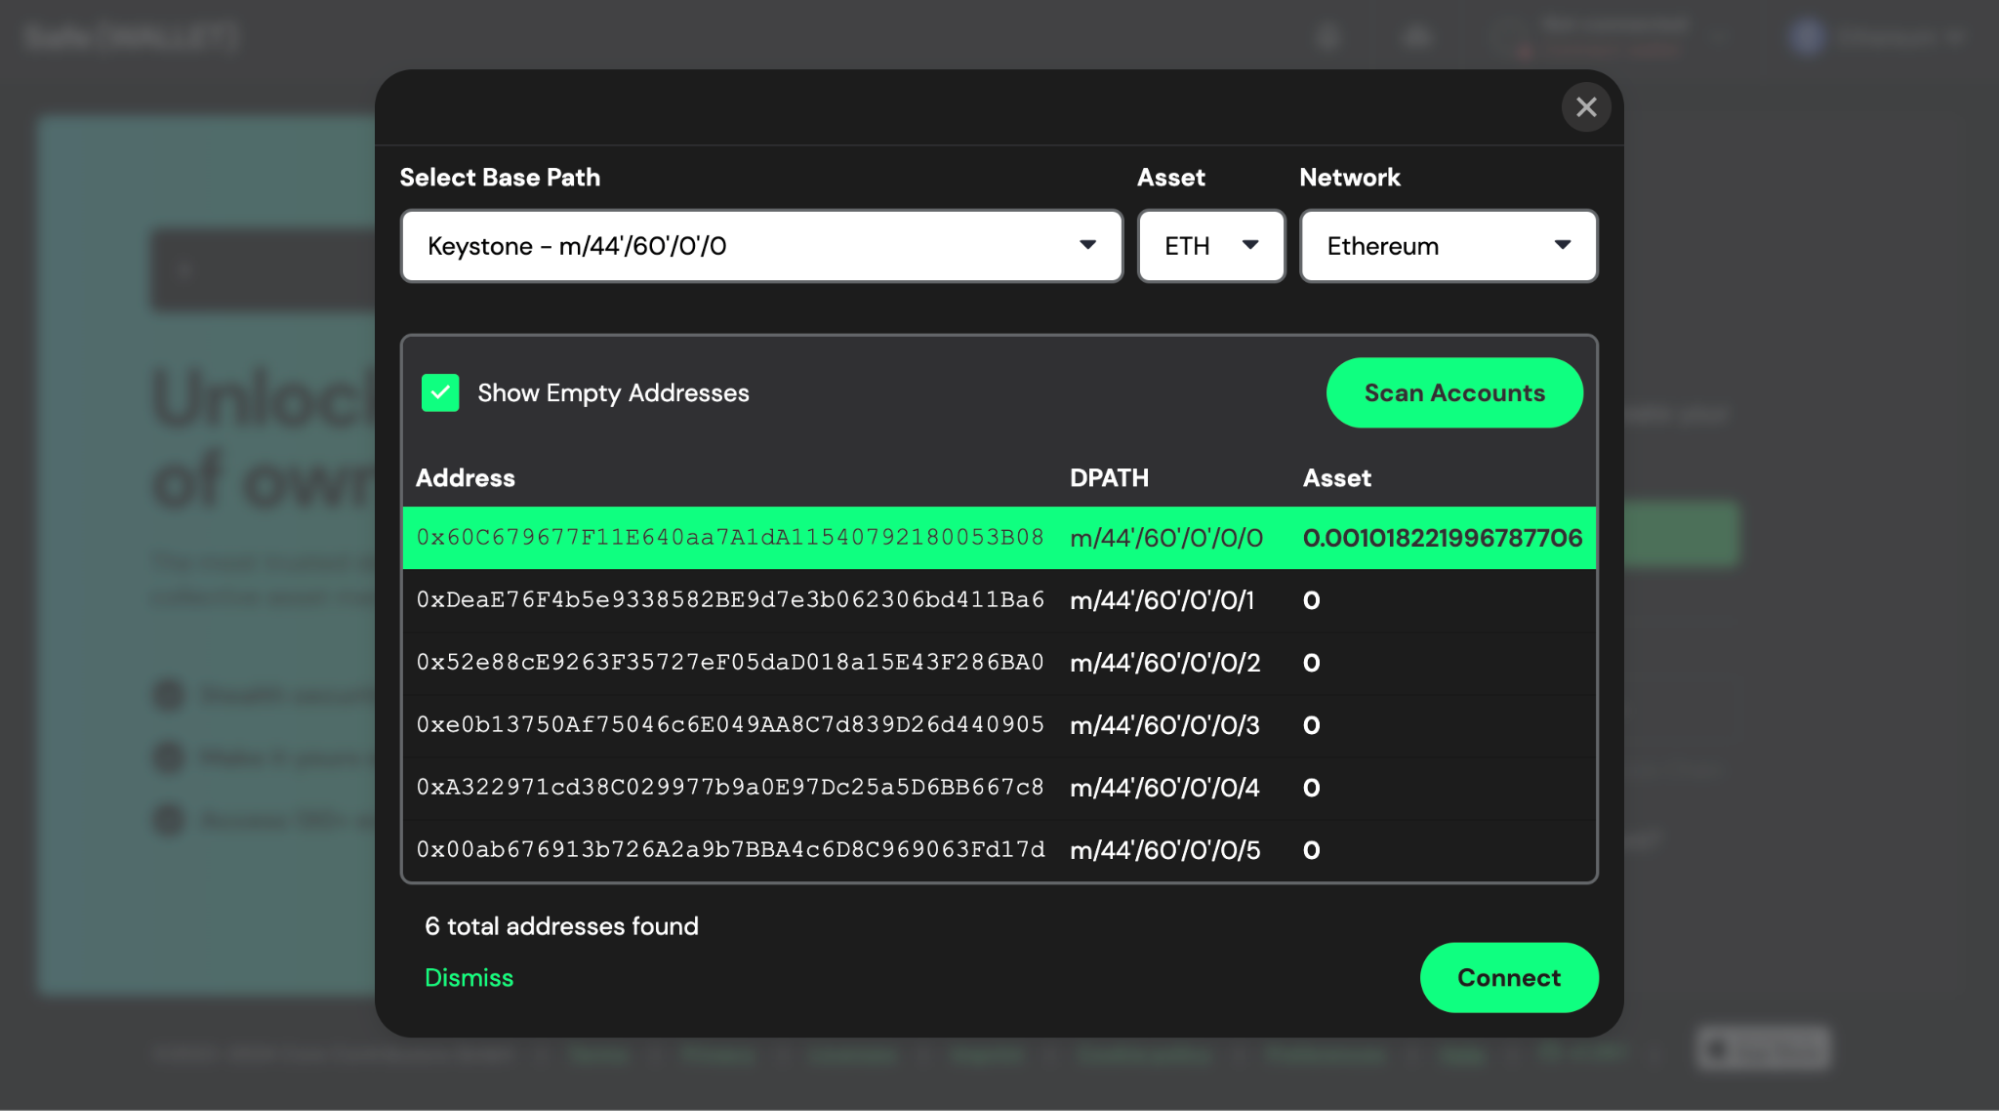
You will be required to scan a QR code from the Vault app. If you are new to AirGap Vault, follow the step-by-step guide. Open AirGap Vault and tap on your desired secret. Then, select an Ethereum account from the list. Now, tap on “Metamask” (both, SafeWallet and MetaMask use the same QR-standard) The AirGap Vault will now show you a SyncQR code -Scan it with your PC.
When you are done scanning the QR, Click on “Scan Accounts”. Then, select your desired account from the list and click Connect.
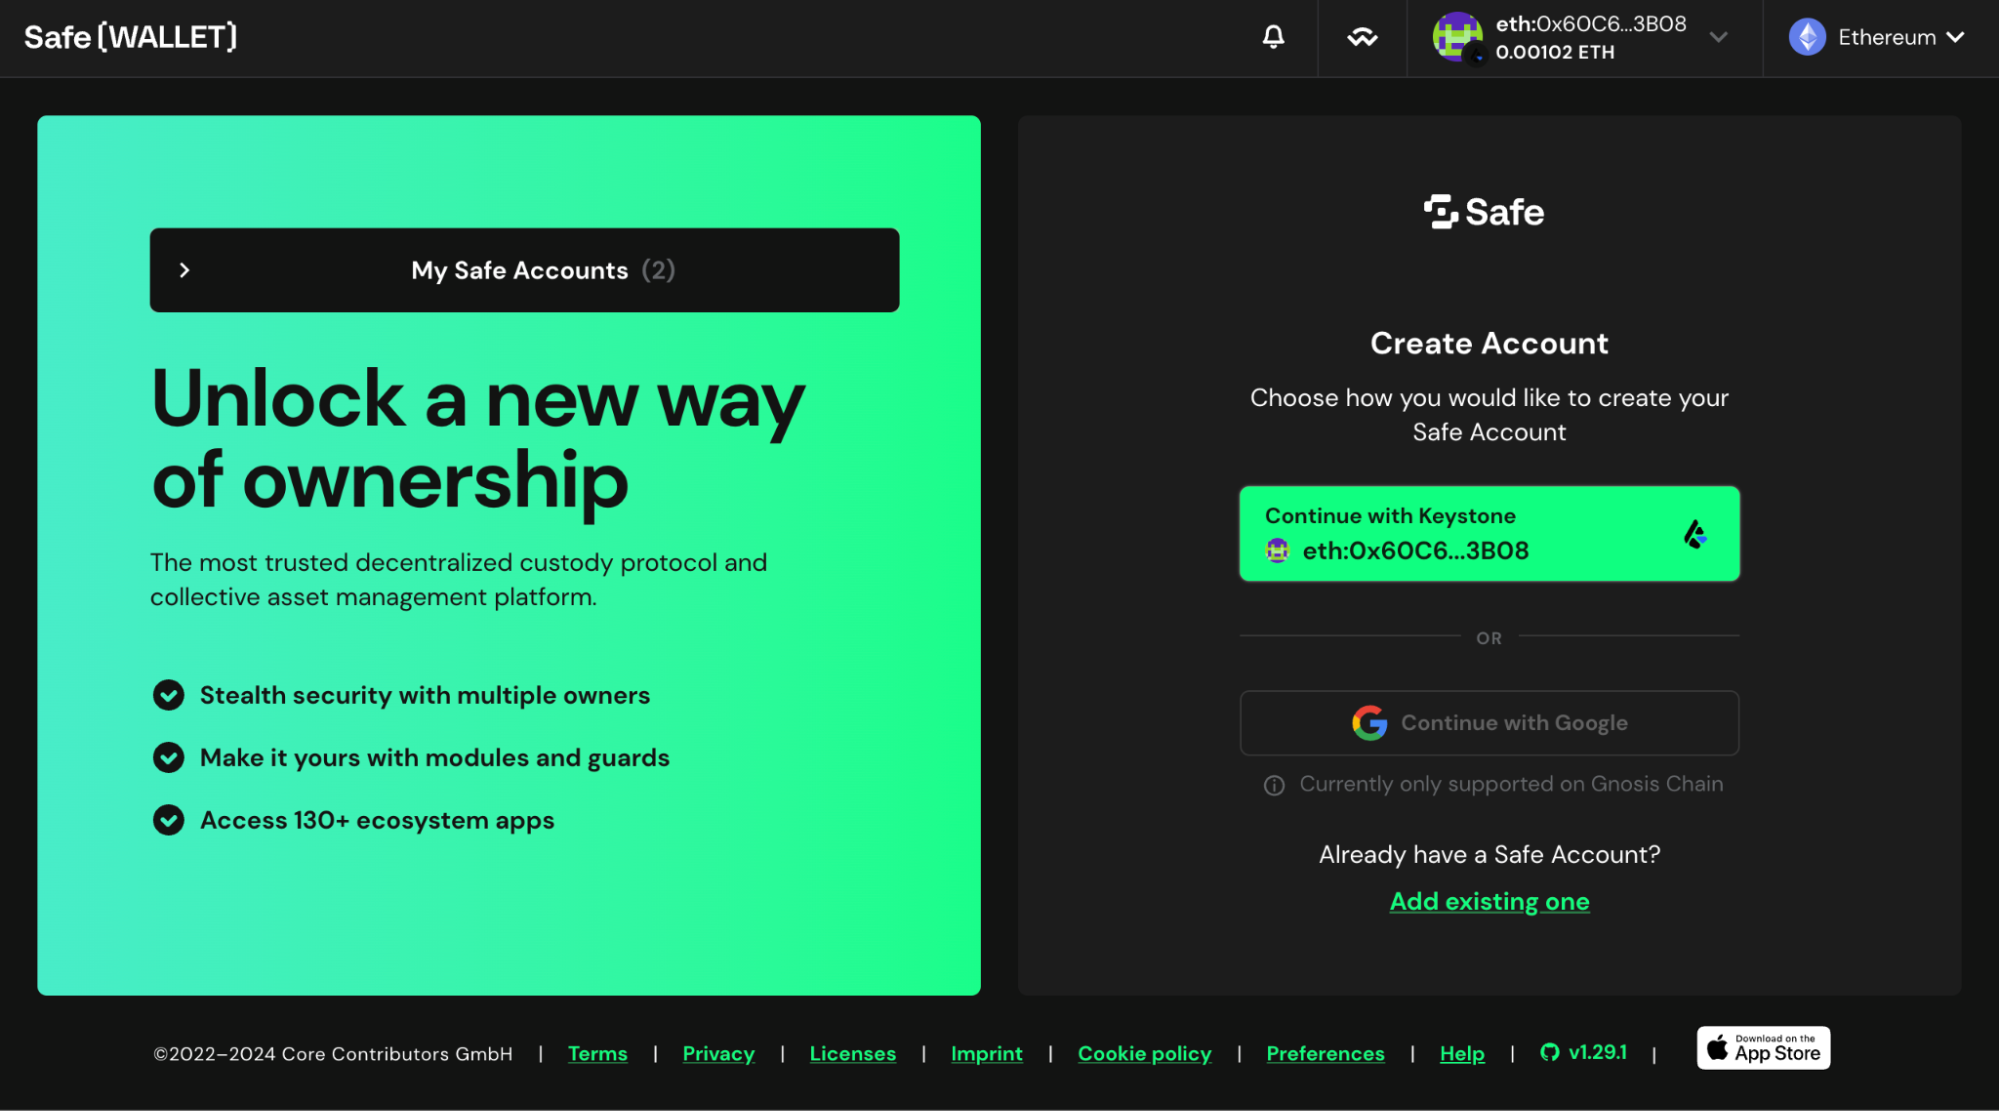
- Now, on the overview page we ,click “Continue with Keystone”.
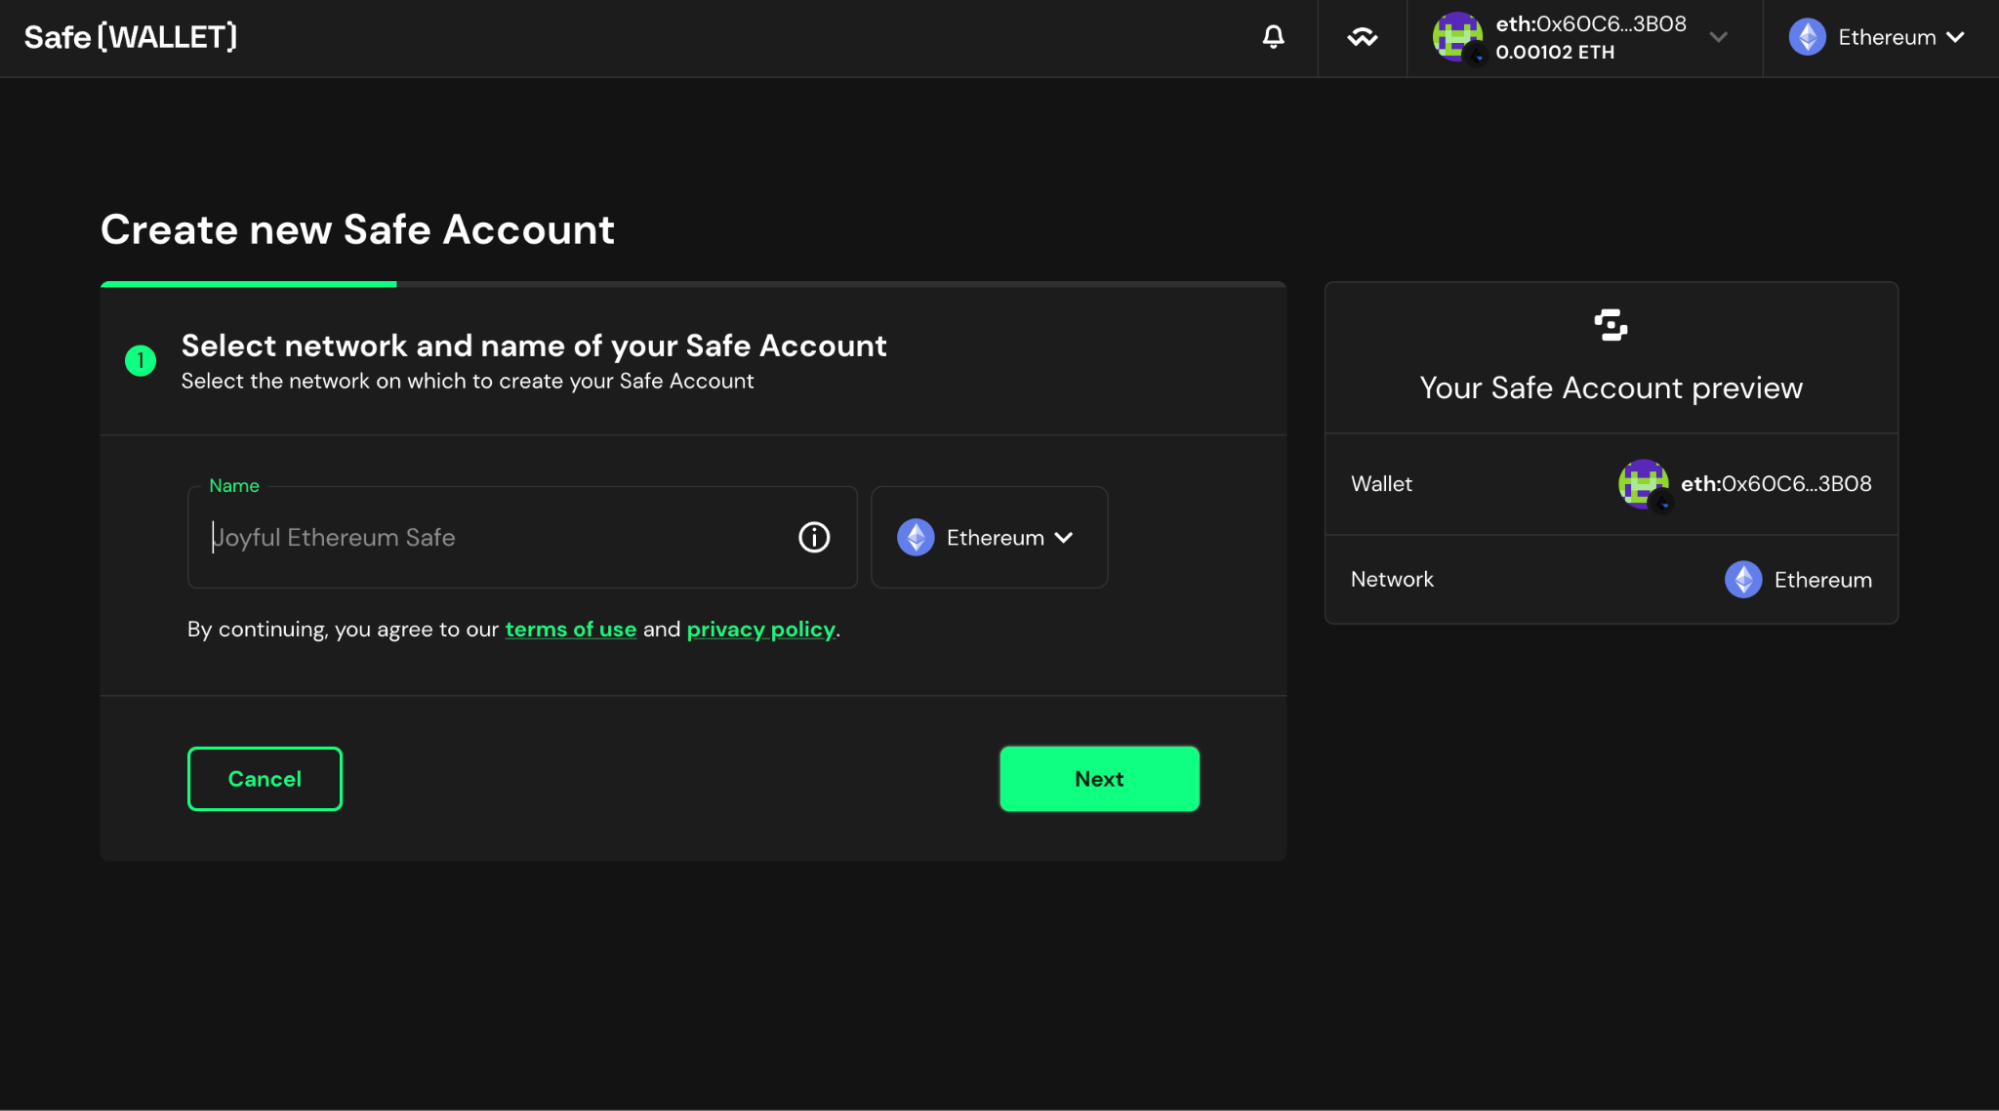
- Now, set a name for your Multisig wallet. Make sure that you have selected Ethereum as your desired blockchain. Tap Next.
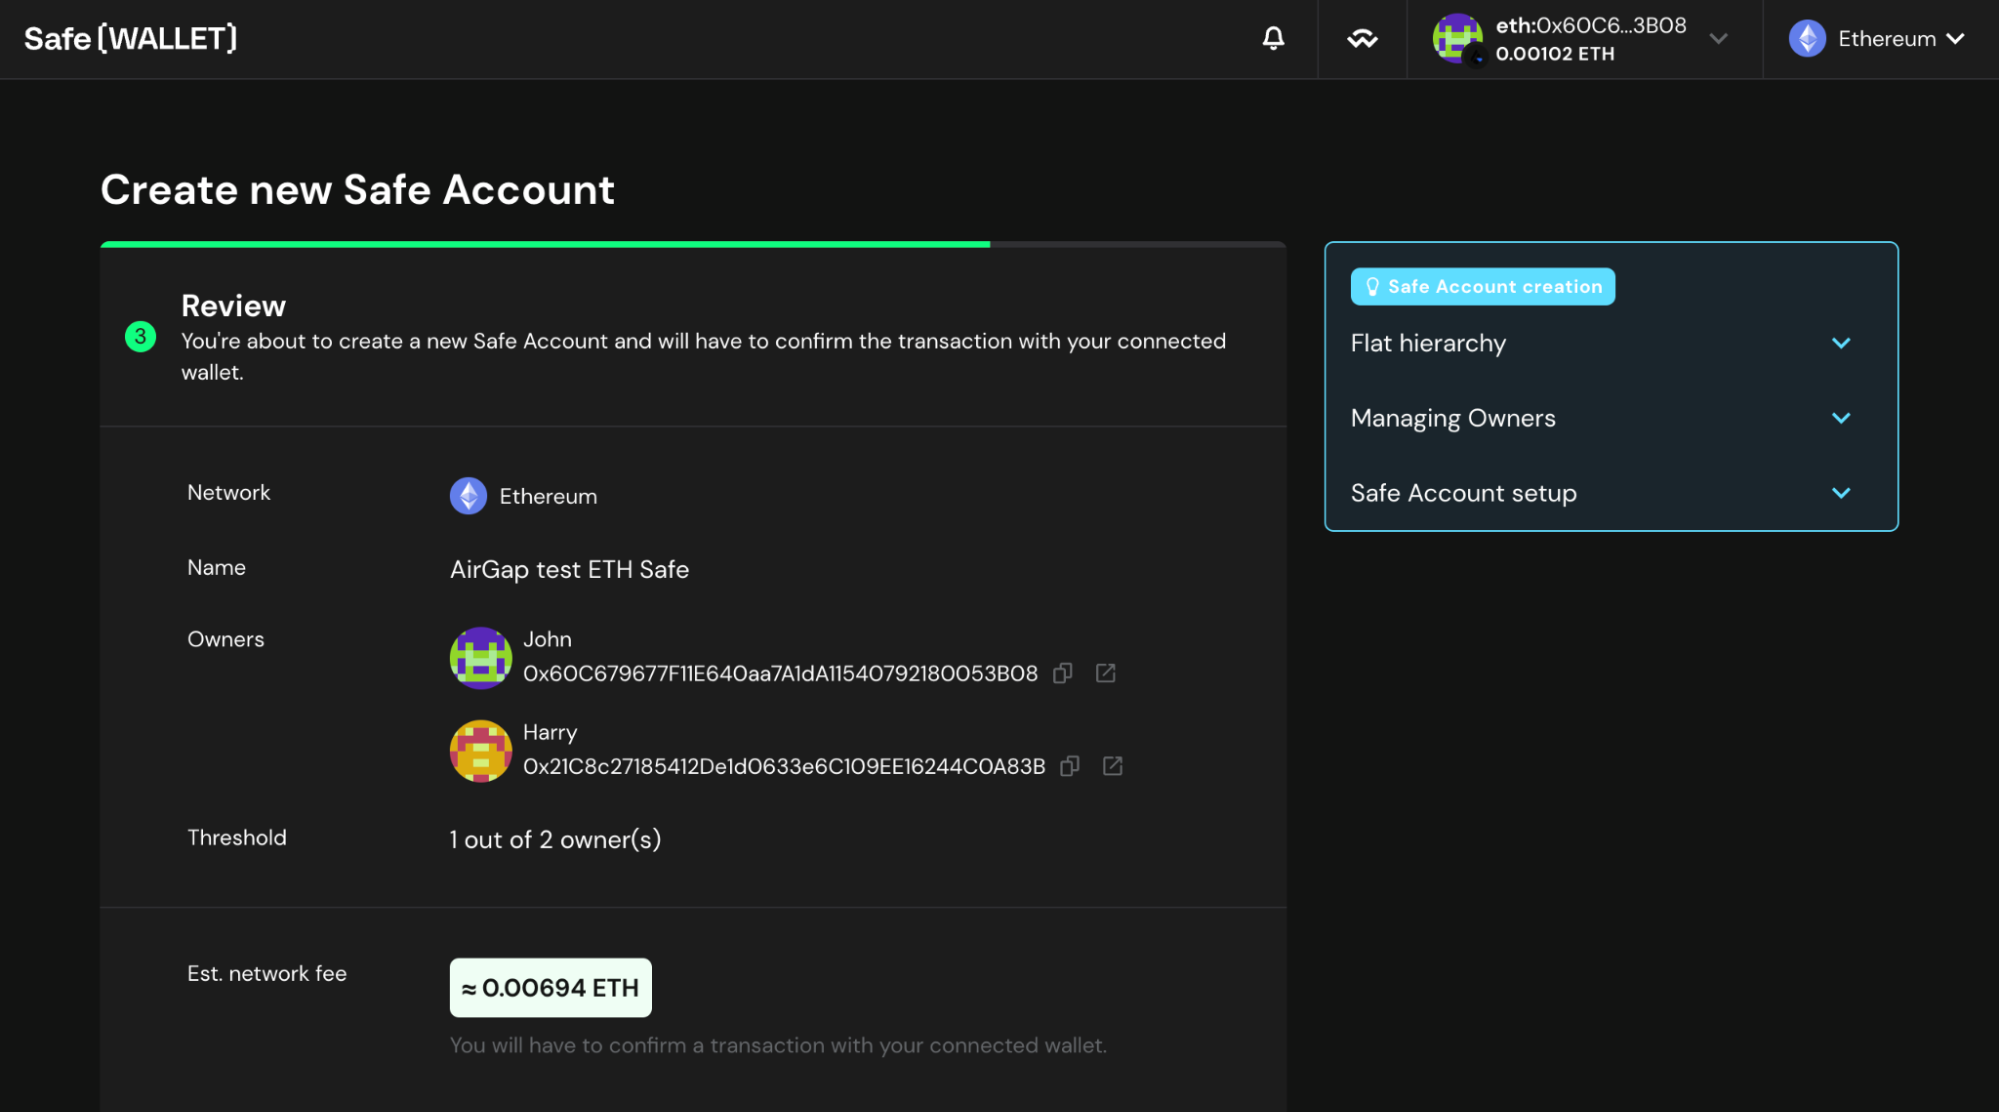
- Here, you need to set the owners of the Multisig wallet. Click on Add new Owner to add multiple owners. You can add as many owners as you like. Carefully enter their addresses and set an Alias for each owner. Then, you need to select the threshold. The threshold of a Multisig wallet is the minimum number of signatures required to authorize a transaction or make changes to the wallet. When done, tap next.
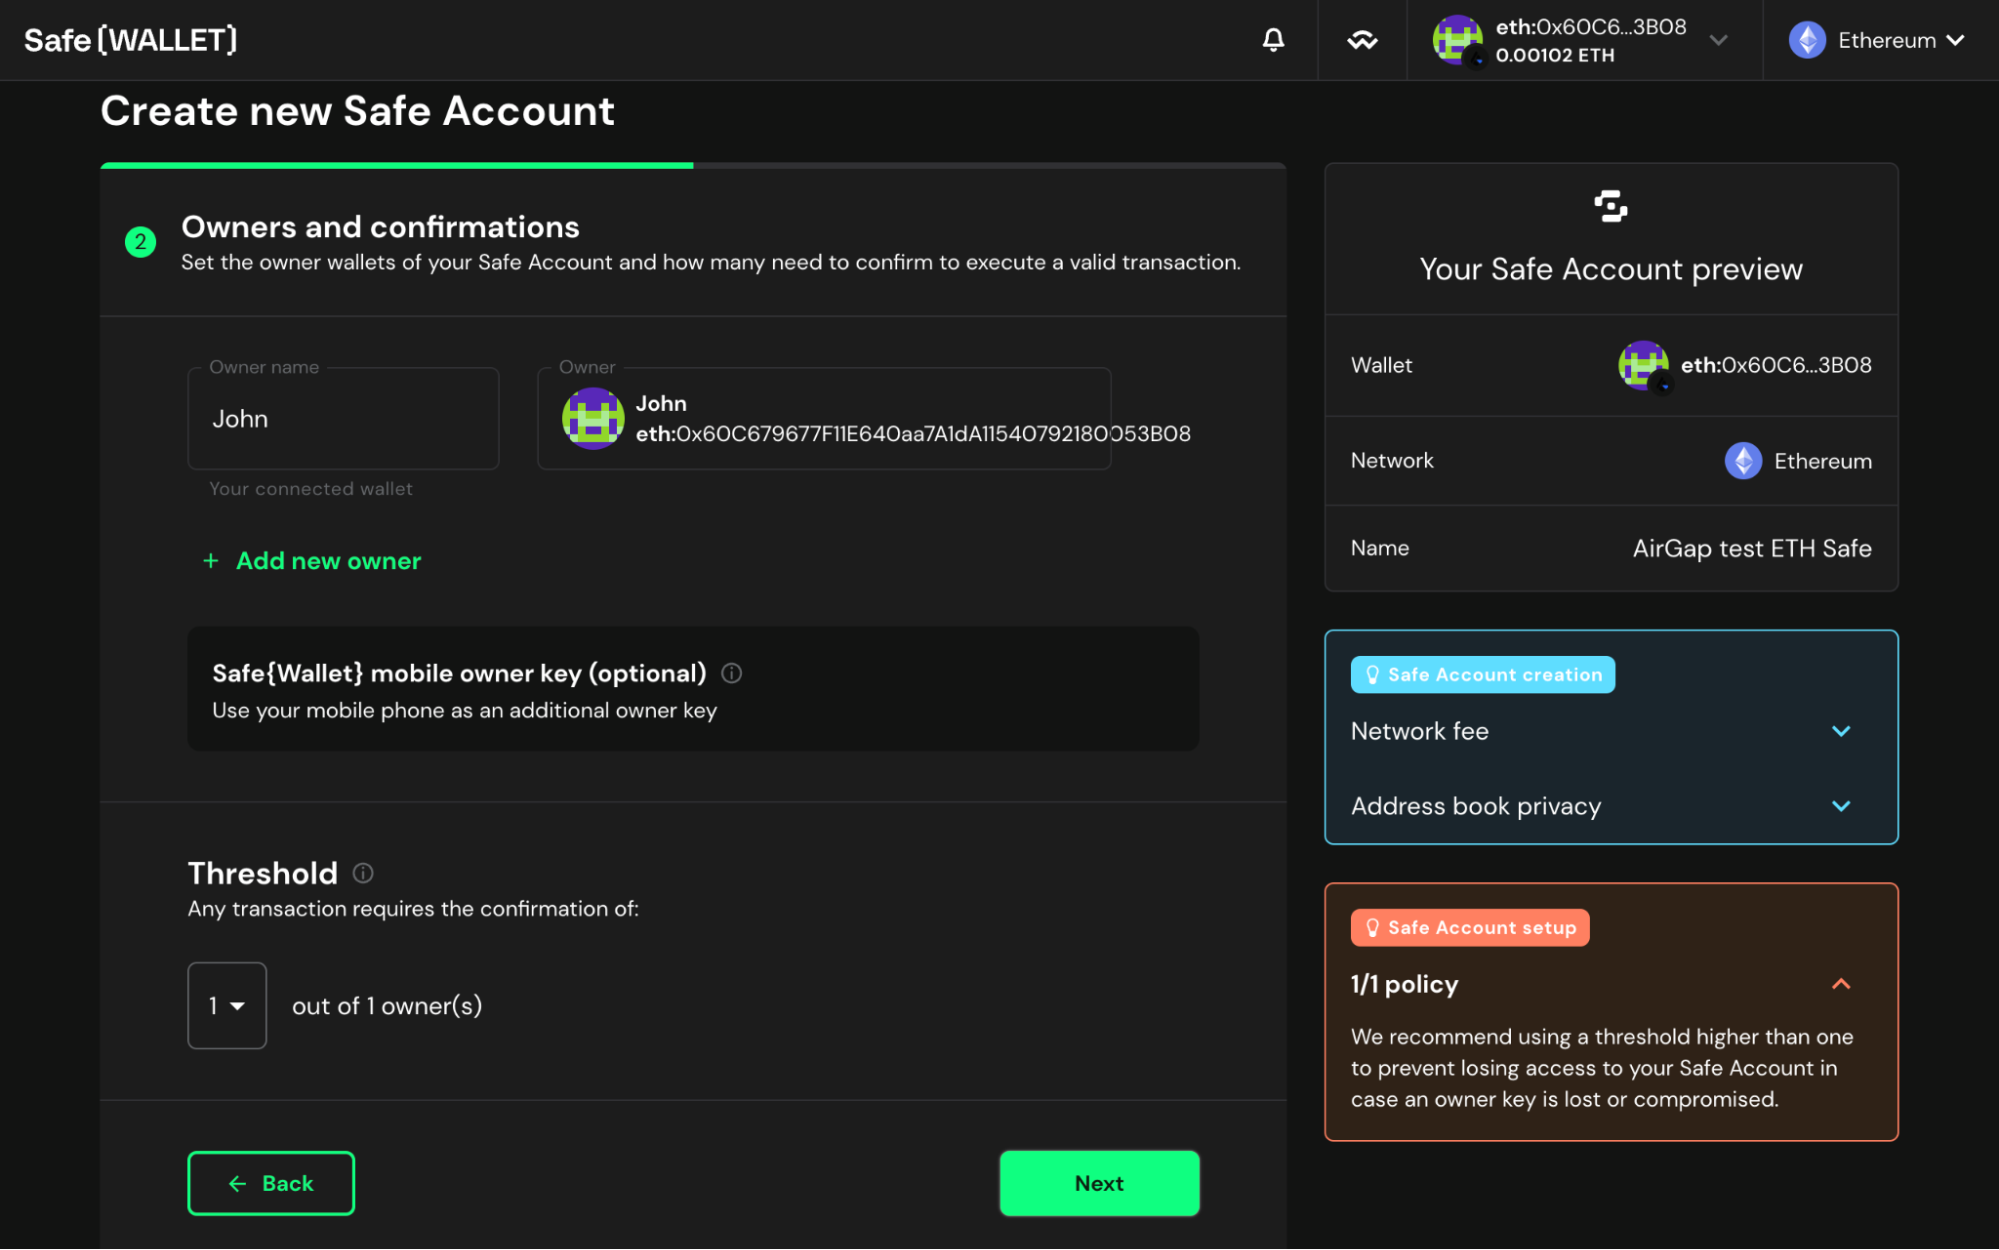
- Review the owners of the Multisig wallet and the threshold. Also, make sure that you have enough ETH to pay the gas fees required for this transaction. If you do not have enough ETH, you can buy it via Mt.Pelerin here.
- After a few seconds, a popup with a QR code will pop up. Scan this QR code with your AirGap Vault app. Verify the transaction details and tap the “Sign transaction” button.
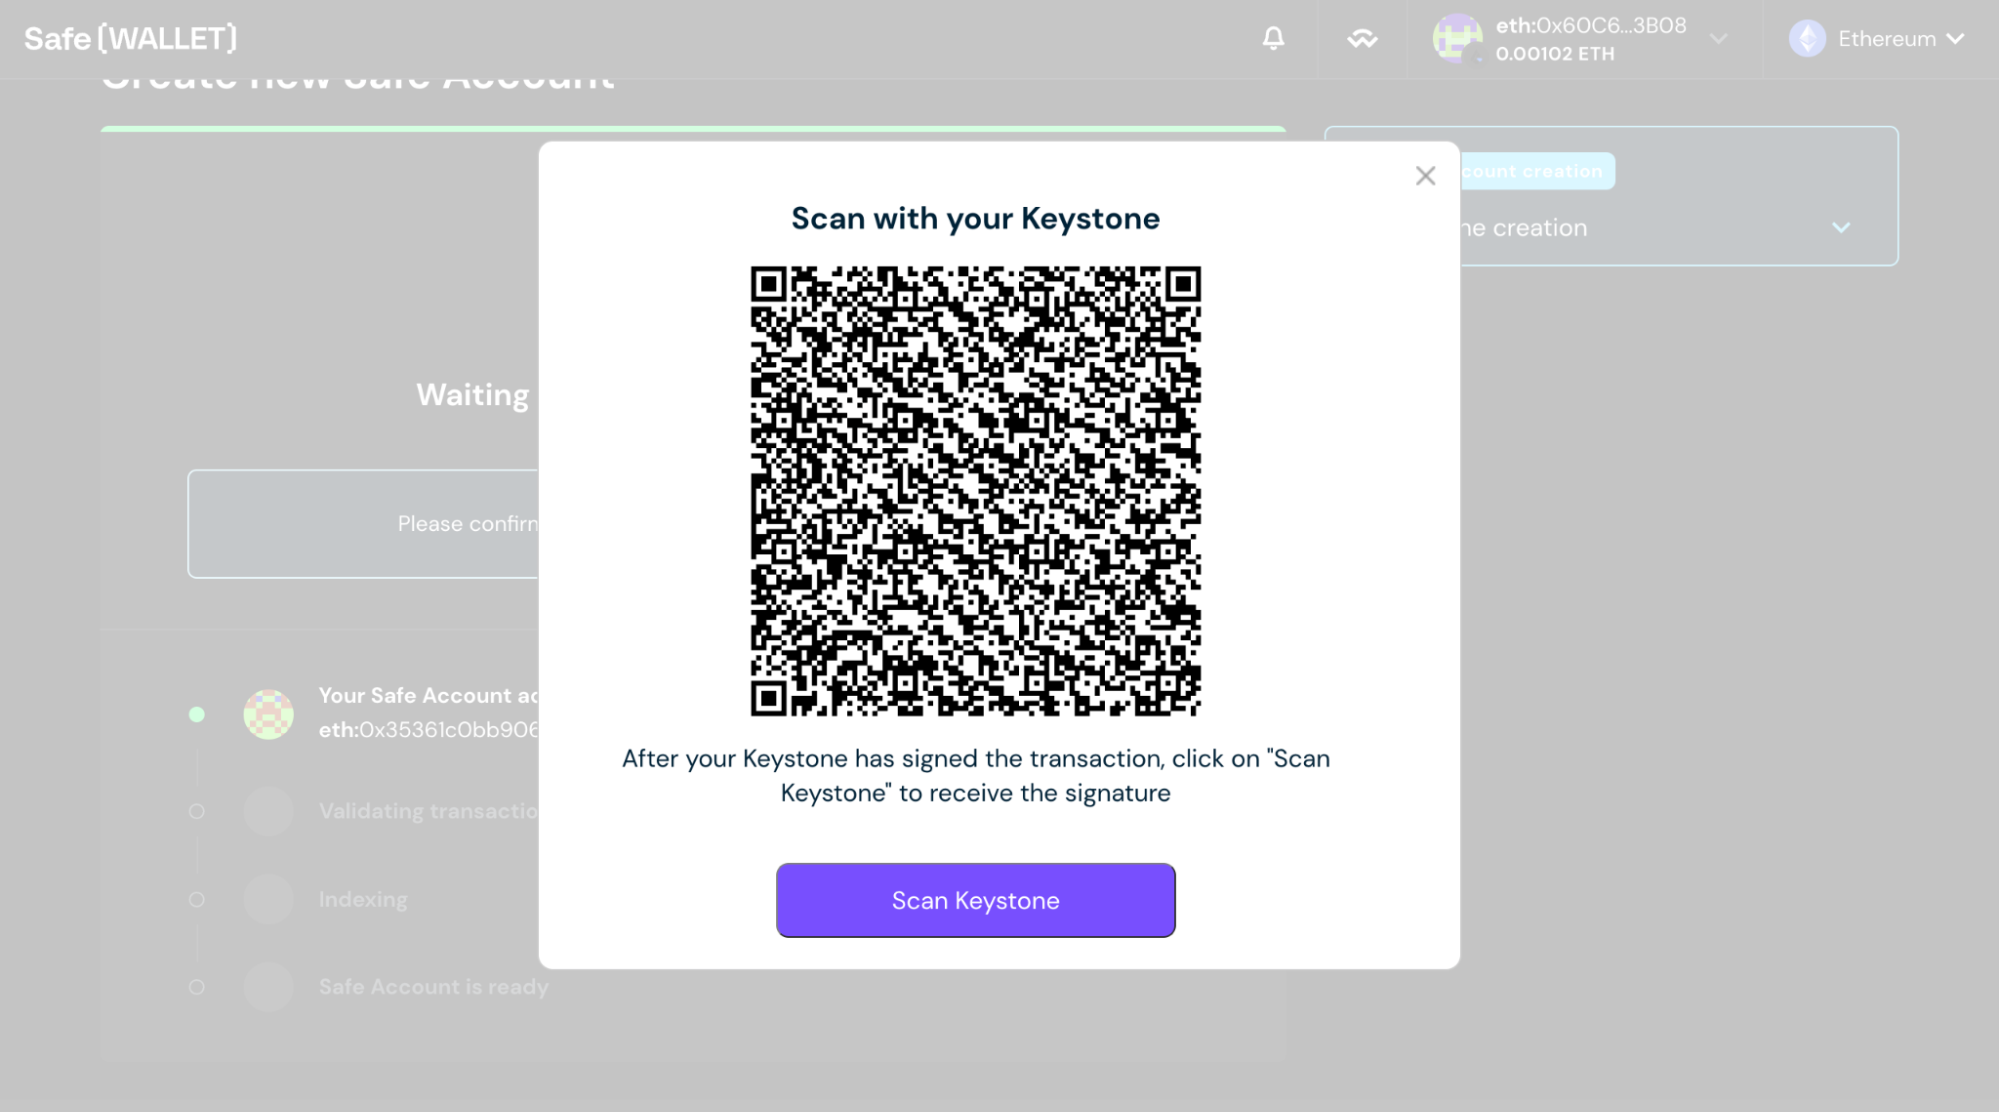
- The AirGap Vault will now give you a QR code. Click “Scan Keystone” and then scan the QR code from Vault. SafeWallet will start validating the transaction. This might take a moment. When it's done, you can start using your Multisig wallet.
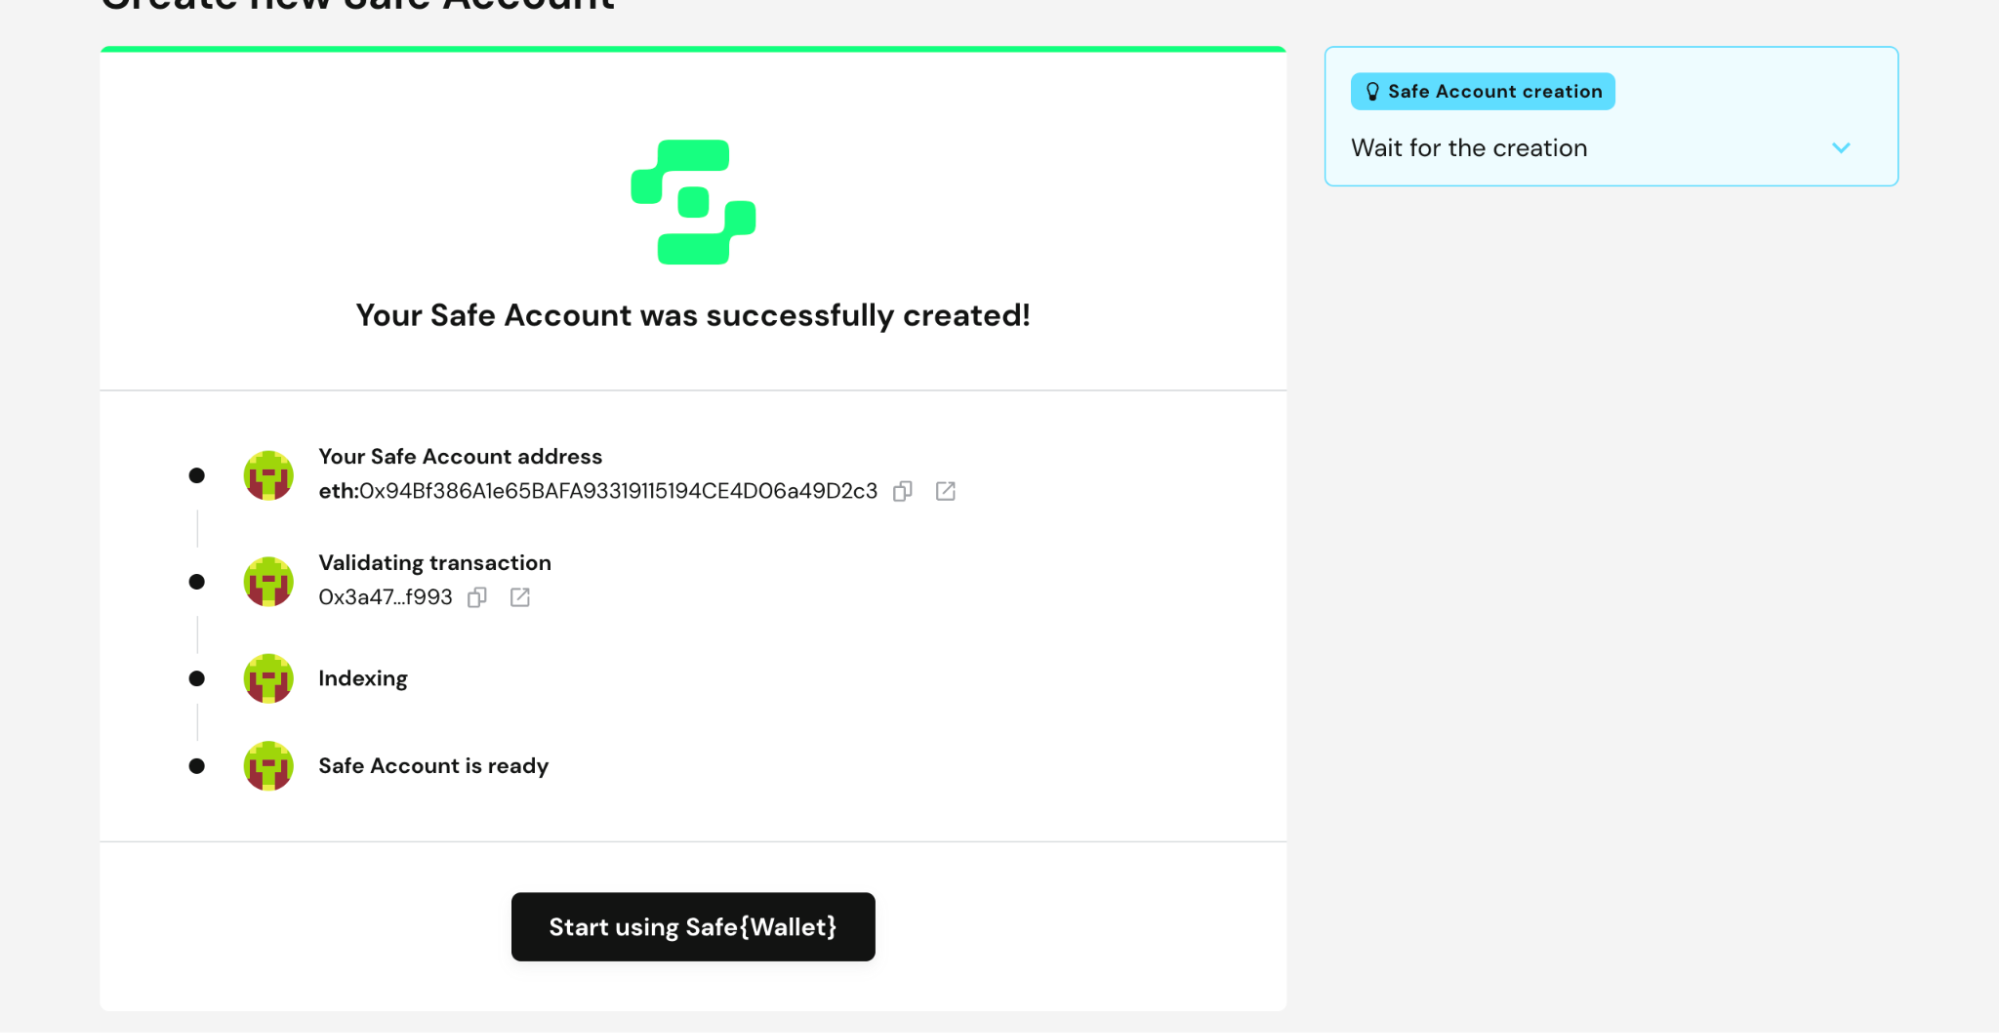
- That's it, you have successfully created a Multisig wallet with AirGap on the Ethereum network. Now you can add crypto to your multi-sig wallet and make transactions with it.